Rose’s Alpha Bakers did another bread this week, and it’s another bread that has a pre-ferment. This time, I actually made the biga according to the recipe, instead of using my own starter. This bread’s biga is made with pumpernickel flour, which a number of the bakers had a hard time finding. Fortunately for me, I was able to adjust the granularity on my flour mill, and produce something that (probably) closely resembles pumpernickel flour. Because it’s a stone mill, some of it was pretty fine, and some of it coarser. I don’t think that had any serious impact on the finished bread.

Another tool that I mentioned in my rye sourdough post is my danish dough whisk, but I just noticed there was no picture the other day. My mom got me these for Christmas a few years ago, and I find them really useful for mixing flour & water by hand – really good for pre-ferments.

After that was mixed, it’s supposed to sit at room temperature for 6 hours. For me, this was overnight, in a quite cold kitchen. The next morning, it was so active that it had popped the lid open on its plastic container. I pushed it down a bit and stuck it in the fridge. When I got home from work, it had popped its lid AGAIN. I pushed it down again, and it settled down a little for the next 2 days. On Saturday morning, it looked like this, from the bottom:

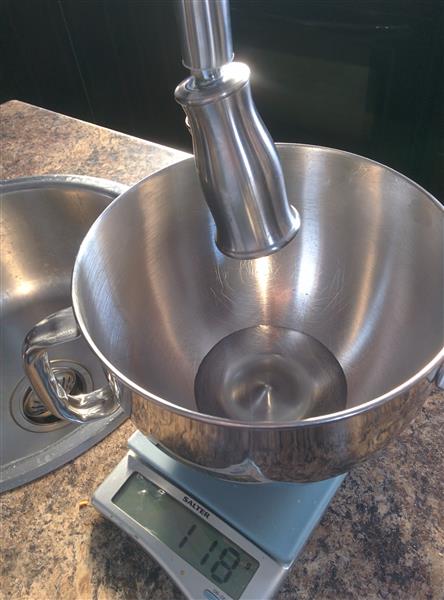
Then it was time to bake. By the way, I’m super lazy (efficient?), so I love the fact that I can set my bowl on my scale, swing the faucet around, and fill directly from there.
The process goes something like – break the biga up into small pieces, add to the water. Add 1/2 bread flour, 1/2 all purpose flour, and some yeast. Mix that up into a rough dough, then add the salt.

I think this was the autolyse phase? Don’t remember. At some point, you let it sit for 20 minutes before coming back to it. I took advantage of that time to toast and break up/skin my walnuts.

The skin on many nuts tends to be bitter, so to prevent that bitterness from making it into your baked goods, you can rub the toasted nuts in a clean tea towel, resulting in a significant portion of the skin staying stuck to the towel.

Break the walnuts up a bit, either in the towel, or on the way into a bowl, and you’re ready to introduce the nuts & raisins to the bread dough. I had a hard time with this step. The dough clung to the dough hook, and the raisins and nuts floated around the bowl. I ended up dumping it on the counter and kneading it together by hand. Then, into my trusty rising container.

After it’s risen, been stretched and folded, and risen again, you’re ready to shape and add apricots. Because it wouldn’t be swedish apricot walnut bread without apricots.

The instructions talk about pressing it into a rectangle, folding down the top corners into a triangle, then adding the apricots in a staggered line. I’m not sure if I was doing this right, but I’ve never been fussy about the shaping of my bread. It’s still bread, right? So, then you roll it up into a torpedo shape, to proof.

Once it’s proofed, you cut slashes in the top, then bake it on a baking stone, with ice cubes added to the oven for steam. You’re also supposed to mist the loaf with water before baking, which I forgot to do. I also forgot to take any further pictures until after I’d had *ahem* two slices.

The lighting was bad when I tried to grab a crumb picture, and I’m too lazy to go down and try again right now:

I probably didn’t let it proof quite long enough, and as a result, I didn’t get a big open crumb, and my loaf is somewhat rounder than what I’ve seen from my baking buddies, and quite a bit rounder than what’s pictured in the book. Not sure I care, though, because I like it just how it is, and I can still get a nice wide slice by cutting on the diagonal. I offered a piece to my husband, though, and told him it had raisins in it. He gave me “the look” and I said, “Hey, at least I warned you. They’re not surprise raisins.” He’s got a few issues. 😉 One of them is finding raisins in baked goods, particularly when he feels they should be chocolate chips!

Wow.. mine looks like yours, I also did not get open crumb, like the book picture.. sad to say, this one was not one of my favorites.
LikeLike
I like your lazy efficient way. If I could do that, I would too! I’m always looking for short cuts and faster way to doing things. :p Now I want your danish whisk! I always see it but didn’t occur to me to buy it. Now when i see it, I will want to buy it! Your bread has oven spring, at least it opened up! I like your bread and how it is shaped and I can see that there is oven spring, at least your slashes opened up.. nothing happened to mine..it just looked the same before and after it is baked.
LikeLike
Faithy, I have a theory that if you under-proof bread, which I think is what I tend towards, you get more oven spring. I haven’t done a side-by-side experiment to test this theory, but maybe I will at some point.
LikeLike
Kristina: I like your theory about under-proofing bread to get more oven spring! I’m going to keep that in mind! Your step by step photos are great and the bread looks terrific. I really love this recipe. I fight my lazy nature every moment of every day. Sometimes I win, sometimes it wins!
LikeLike
lol – the last bit you shared about your husband cracked me up. Anyway, I didn’t get much spring either. Love your efficiency :).
LikeLike
Wow, for your biga to be that active you must have had really good quality rye seeds and so fresh from your grinding machine. There really is a difference! Love the water facet. My kids and your husband are in total agreement on chocolate chips should replace raisins in all baked things!
LikeLike
You are making me want to get that flour mill! Plus the dough whisk has been on my wishlist forever. Loved your post!
LikeLike
Your bread looks like the most springy of all the testers. I wonder if it is the fresh flour as Vicki suggests? Or your theory of under proofing? Bread making is a craft as well as a science!
LikeLike